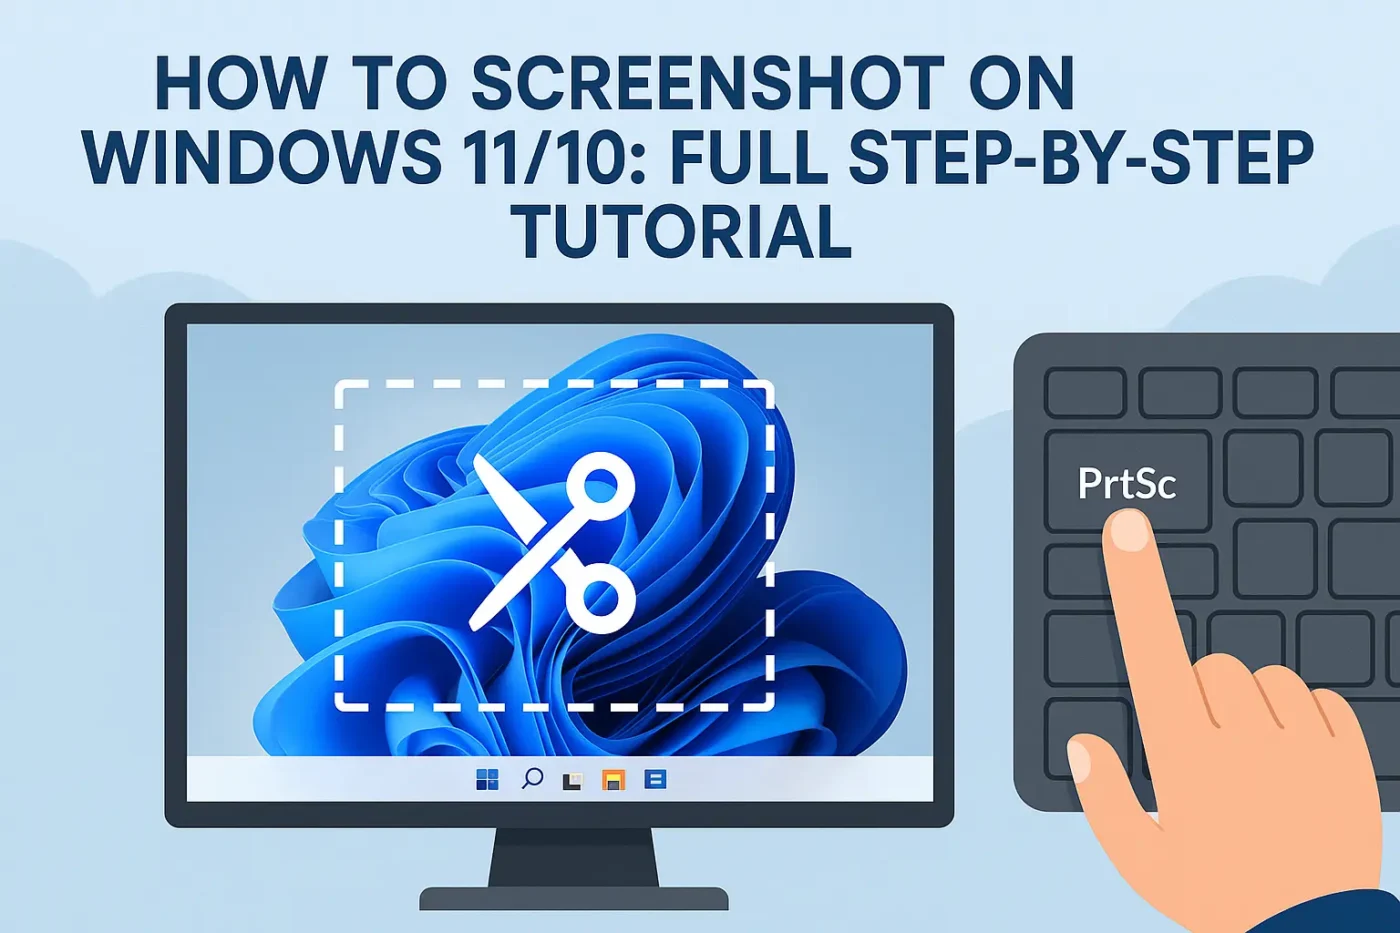
Taking a screenshot on Windows 11 or Windows 10 is easier than ever, but with multiple methods available, it can be confusing to choose the right one. Whether you need to capture your entire screen, a specific window, or just a portion of it, this step-by-step tutorial will guide you through all the built-in tools and shortcut keys available in Windows.
From the Snipping Tool to keyboard shortcuts like PrtScn and Windows + Shift + S, we’ll cover everything you need to know to screenshot like a pro. Perfect for beginners and experienced users alike!
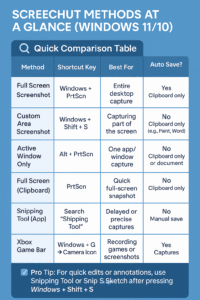
Screenshot Methods at a Glance
Looking for a quick way to take screenshots on Windows 11 or Windows 10? Here’s a handy comparison table that summarizes the most popular screenshot methods, keyboard shortcuts, and their best use cases.
Whether you’re capturing the full screen, a single window, or a custom area, this overview will help you choose the right method fast.
How to Screenshot on Windows 11/10: Full Step‑by‑Step Tutorial?
Taking a screenshot on Windows 11 or 10 is simple once you know the right method for your needs. Here’s a step-by-step breakdown of the most popular and effective ways to capture your screen:
1. Use Windows + Shift + S (Best for Custom Area Screenshots)
Step-by-Step:
Press Windows + Shift + S.
Your screen will dim, and the Snipping Tool will activate.
Choose from 4 snip types: Rectangular, Freeform, Window, or Fullscreen.
Select the area you want to capture.
The image is copied to your clipboard; paste it into Paint, Word, or an email.
Why use it?
Flexible and quick, perfect for capturing a specific part of your screen without saving unnecessary areas.
2. Press the PrtScn (Print Screen) Key
Step-by-Step:
Press PrtScn on your keyboard.
Open an app like Paint or Word and paste (Ctrl + V) the screenshot.
Save the image as needed.
Why use it?
Good for full-screen captures when you want to manually edit or paste the image.
3. Use Windows + PrtScn (Auto-Save Fullscreen Screenshot)
Step-by-Step:
Press Windows + PrtScn.
The screen will briefly dim.
Find your screenshot in the Pictures > Screenshots folder.
Why use it?
Automatically saves the full screen to your drive, ideal for fast capturing without manual saving.
4. Alt + PrtScn (Capture Active Window Only)
Step-by-Step:
Click on the window you want to capture.
Press Alt + PrtScn.
Paste the image into any app and save it.
Why use it?
Perfect for capturing only the currently active window, clean and focused.
5. Use the Snipping Tool App
Step-by-Step:
Search for Snipping Tool in the Start menu.
Click New to start a snip.
Choose snip type and capture.
Edit, annotate, and save directly from the app.
Why use it?
Great for detailed screenshots with built-in editing features.
6. Xbox Game Bar (For Gamers and Screen Recording)
Step-by-Step:
Press Windows + G to open the Game Bar.
Click the Camera icon to take a screenshot.
Find it in Videos > Captures.
Why use it?
Ideal for gaming or recording apps, with screenshot and video capture options.
Using the PrtScn (Print Screen) Key
The PrtScn (or Print Screen) key is a quick and easy way to capture your screen on Windows. Here’s how to use it:
Capture the Entire Screen
Press
PrtScn:This captures everything visible on your screen.The image is copied to your clipboard.
Paste (
Ctrl + V): it into apps like:Microsoft Paint
Word
Email
Photoshop
Capture Only the Active Window
Press
Alt + PrtScn:This captures just the window you’re currently working in.Paste it wherever needed.
Save Screenshot Automatically
Press
Windows Key + PrtScn:Your screen will dim briefly.
The screenshot is automatically saved to:
Use with Snipping Tool or Snip & Sketch (Windows 10/11)
If you prefer more control (like selecting a specific area), try:
Snip & Sketch (
Windows Key + Shift + S)Select part of the screen to capture
The image is copied to the clipboard, and a notification appears to edit/save.
Windows + Shift + S (Snipping Tool)
The Windows + Shift + S shortcut activates the Snipping Tool (also known as Snip & Sketch) on Windows 10 and 11. It’s a fast, built-in way to take custom screenshots without needing third-party software.
How to Use:
Press
Windows + Shift + SYour screen will dim slightly.
A small toolbar will appear at the top with four snip options.
Choose Your Snip Type:
Rectangular Snip: Drag to select a rectangular area.
Freeform Snip: Draw any shape to capture.
Window Snip: Click on a specific open window.
Full-screen Snip: Captures the entire screen instantly.
Clipboard Capture
The screenshot is copied to your clipboard automatically.
You can paste it (
Ctrl + V) into:Email
Chat apps
Documents
Image editors like Paint
Edit or Save
A notification appears after the snip. Click it to:
Draw or annotate
Crop or highlight
Alt + PrtScn (Active Window Only)
The Alt + PrtScn shortcut is perfect for that. It quickly takes a screenshot of the currently active window and copies it to your clipboard.
How to Use Alt + PrtScn
Click on the window you want to capture (e.g., browser, app, dialog box).
Press Alt + PrtScn on your keyboard.
The screenshot is copied to your clipboard—you won’t see a save notification.
How to Save a Screenshot
Since it’s copied to your clipboard, you’ll need to paste and save it:
Open Paint, Word, or any image editor.
Press Ctrl + V to paste.
Save the file in your desired format (e.g., PNG or JPEG).
Where Are Screenshots Saved?
After taking a screenshot on Windows, the next big question is: Where did it go? Depending on the method you use, screenshots are either automatically saved to a folder or copied to your clipboard for manual pasting. Here’s how to find them easily.
Auto-Saved Screenshots
If you used shortcuts like Windows + PrtScn or tools like the Xbox Game Bar, your screenshots are saved automatically.
Location:
or
Each file is named in order, like:
Screenshot (1).pngScreenshot (2).pngCapture_1.png(for Game Bar)
Clipboard-Based Screenshots
If you used PrtScn, Alt + PrtScn, or Windows + Shift + S, your screenshot is not auto-saved. Instead, it’s copied to your clipboard.
How to Save It:
Open an app like Paint, Word, or Photoshop.
Press Ctrl + V to paste.
Save the file manually as PNG, JPEG, etc.
conclusion
Taking screenshots on Windows 11 or Windows 10 is fast, flexible, and easy once you know which method suits your needs. Whether you’re capturing your entire screen with Windows + PrtScn, a specific window with Alt + PrtScn, or a custom area using Windows + Shift + S, Windows offers built-in tools to handle every scenario.
For quick sharing, use clipboard-based methods. For automatic saving, go with shortcuts like Windows + PrtScn or the Xbox Game Bar. And for precise control and editing, the Snipping Tool is your go-to.
No matter your workflow, whether you’re a student, professional, or casual user, you now have all the tools to screenshot smarter and faster.